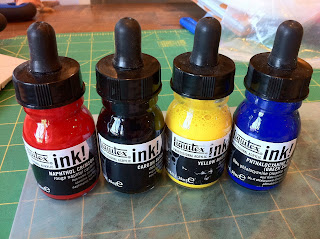
While hosting a retreat at my home last week, I finally got around to trying out my Liquitex inks. Here are the results:
First I just doodled an image on, working with straight ink, meaning I did not dilute it at all. I applied it with a brush.
Then I mixed two colors together to get a brown color, then immediately started to color in areas. I did not let the green dry first, and as you can see the brown bled into the green pretty bad.
So I stopped and used a hair dryer to dry the piece completely before moving on:
As you can see, letting it dry before adding the next color (yellow) really stopped the bleeding problem. I am still working with undiluted ink here:
However, when I diluted with red with a bit of water for the background, you can see that I ran into some BIG bleeding issues. Using diluted ink would do well for creating watercolor type background, but not for detail work.
I did a "drop test" of straight ink from the dropper, I LOVE how it splayed out onto the wet background here.
I really do like these inks, they have a very strong color to them. I would not want to do large pieces or areas with this however. But I may try add the ink to a thickening agent that would allow me to make it easier to apply to large areas without creating the bleeding problems.
Have you used these inks? Did you like them?
After the retreat, I did a little running around and shopping on Saturday, and found a lovely fiber outfit. How awesome is this? I laughed SO hard while doing this, as did many women who walked by. (Oddly, the men in the store did not find it as amusing...)


Oh. . .what a fiber outfit!!! I LOL too!! Interesting information about the inks. I haven't used them.
ReplyDeleteThanks for the information on the inks! I'm always looking for new stuff to try. I LOVE the outfit!! It just needs a red purse to go with it!
ReplyDelete